Ok, after going through hell lot of forums and sites and discussing with unknown people on net, the D day actually arrived of unlocking the iPhone ( Remember my friend's getting one ) . First obv the firmware (FW) mystery was eating us from long that whether we'll get 1.0.2 or the latest 1.1.1 . 1.0.2 was easily jailbreaked and the process was pretty easy. Then apple somewhat battling with the whole army of hackers came on the battlefield with a new 1.1.1 which was supposedly jailbreak proof. But then really, amazing brains found a detour to mod the iPhone and install 3rd party applications.
I'm going to write step by step in easiest possible way to unlock and activate 1.1.1 which worked flawlessly for me. Pls read again and again and again. Most of the questions will be answered.
Here are the things required for unlocking your iPhone
- iPhone (duh ) But remember this guide is for only freshly opened FW 1.1.1
- Wifi access point for net
- Fast internet
- And I recommend, you should know how to share your net thru wifi without any access point i.e. without a router. Just a computer with wifi.
- You dont need a Mac or a pc untill unless you want youtube to work. For that, you will be needing WinSCP and SSH.
- There are some things you should know before you perform anything on this site. There is obviously some risk involved here, but everyone I know of has been able to restore their iPhone by using iTunes. I've heard no report of anyone damaging their iPhone by modding it when using the correct program(s) properly.
- You risk voiding your warranty.
- This site is not for those uncomfortable around computers. If you aren't sure about something on here, then I recommend stopping what you are doing and connecting your iPhone to iTunes, and signing a contract with AT&T.
- Any modifications you perform on your iPhone, including bypassing activation and unlocking, could be reset if you should install a firmware update provided by Apple. It's a simple matter of redoing everything you previously did to get your iPhone back the way you had it once you update provided the new firmware has been deemed safe.
- Read the instructions in their entirety. If you can't follow directions, you may damage your iPhone requiring a replacement from Apple.
- I am not responsible for your results if they are less than what you expected. You assume all risks. I recommend seeking help in iPhone hacking forums or in the various IRC channels. Check my links page to find them.
- If you have not activated your iPhone via AT&T, then you will lack the ability to use visual voicemail.
Step 1
OK, first take out your brand new iPhone from the box and put your sim in ur iPhone as shown below :
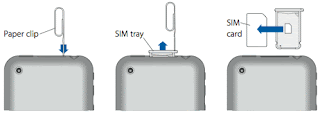
Switch it on by pressing the sleep button on top.
If you not sure of your FW, switch on the phone and on the activation screen, slide the slide for emergency
 calls and dial the following no. *3001#12345#*
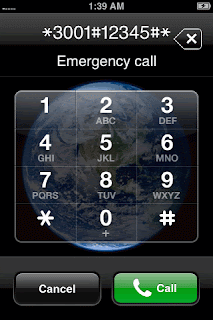
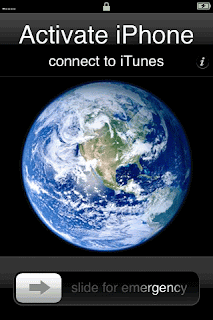
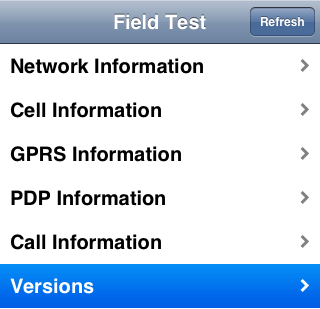
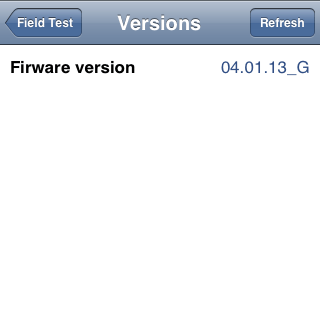
If your iPhone has FW 1.1.1 , the firmware version shown 0.4.01.13_G like shown in the above pic.
Phones with FW 1.0.2 will hav 3.14.08_G.
Step 2 :- Tiff Exploit
(Note, it has been news that phones within a week been bought are Tiff exploit resistant )
Press HOME button and you'll back to the Activation Screen .
Again Slide for emergency calls and Dial *#307#

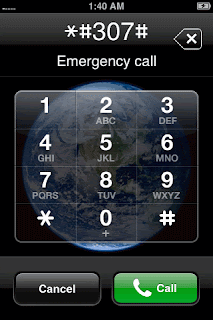


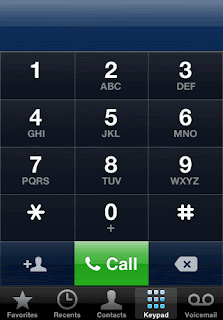
On this screen, Press the CONTACTS button on the left of the highlighted Keypad in the bottom panel. On this screen , on the Top Right, press ( + ) button and add a new contact. Give any name and then press ADD NEW URL.
Ok here is where the fun part kicks off. Enter for the url : prefs://1F and then press SAVE on the Top Right. It'll take you back and Press SAVE again.
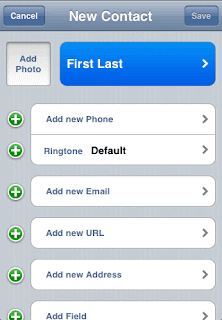
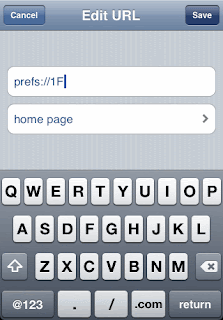
After coming to the screen shown below, Press the url homepage highlighted in blue and this will take you to the settings screen.
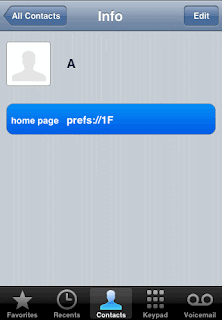
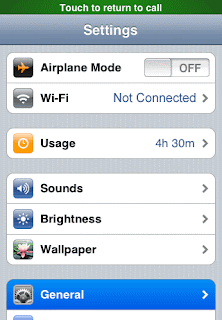
Then, goto GENERAL button and then navigate to AUTOLOCK and set it to NEVER !! And then on the GENERAL screen, Press Wi-Fi and select your wifi network ( working with internet). If you dont have a router, you can still do it with changing the from available network to Peer to Peer connection in advances menu of Wi-Fi properties.
Join this network and then Press HOME.
Step 3
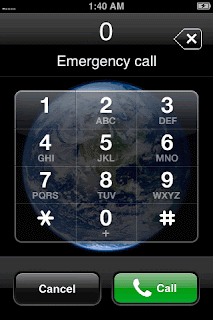
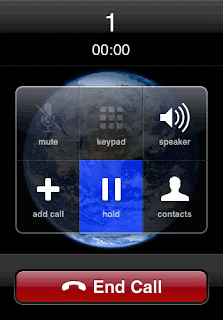
Ok, If you really were able to do this and reached till here, Press the HOME button and dial 0 , Phone will ring again answer and then HOLD and then DECLINE. Then make a contact with any name and again add a url for this new contact as well and give the link : http://jailbreakme.com.
And then press SAVE and do the same process of going back and then Press the url button.
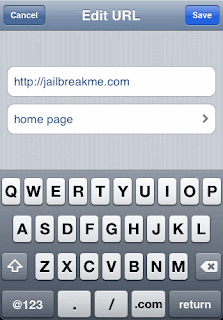
Ok, once you land up on jailbreakme.com , scroll down and install AppSnapp.
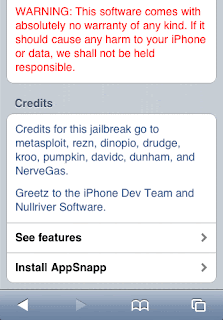
After installing AppSnapp , safari will crash in few seconds. IMPORTANT : If Safari doesn't crash after 1 minute, then press the Home button. Wait until the iPhone becomes responsvie, then go into the emergency keypad again and enter 0 and press Call. Go back to the contacts screen and press Z and press the home page button again.
So finally when you manage to crash your Safari, it will send you back to the activation iPhone screen. Wait for arnd 30 seconds and the iPhone will warble and the shiny slider will freeze and start again. The iPhone will then ring , so slide the slide to answer.
After sliding to answer the ringing iPhone, the phone will freeze. You dont need to worry about nething here. Just press the SLEEP button on top till the power off slider appears and turn in back ON .
Doing all this will bring you on ur spring board. Wallla. .!!
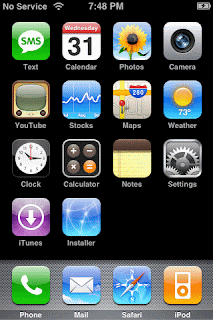
The next step is to use the Installer program to install Community Sources, BSD Subsystem and add anySIM's webhoster to the list of trusted sources so that you can install that program as well.
On the Springboard, launch INSTALLER and it'll jump to update so just be kind and let it folks.
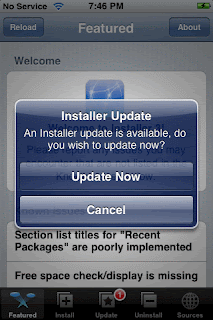
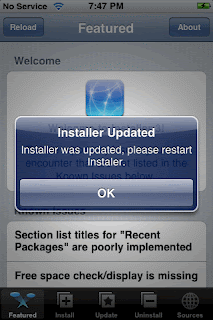
Ok restart the phone and slide to unlock. And again launch INSTALLER.. Now on the bottom pane, press INSTALL and this screen will pop up shown below. Navigate to sources
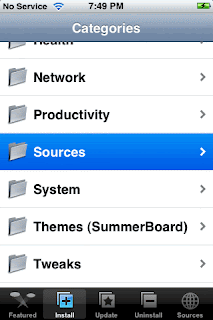
With the installer only you'll be able to install most of the applications on the installer. Press COMMUNITY SOURCES and after getting some useless info about the software, just dont waste time reading guys, go and Press INSTALL on top right.
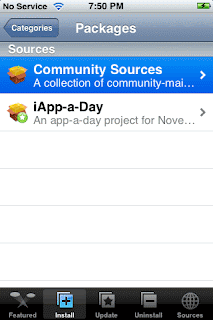
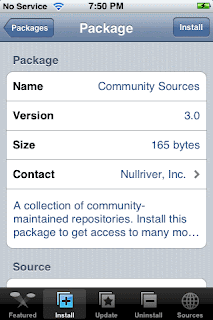
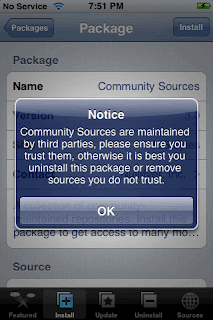
Then confirm installation and press OK. ( Press OK st. away if really blindly agree to the terms really. )
Done with this, you should be back on the List of Folders and from here navigate to SYSTEM install BSD Subsystem. It'll take time to install so have patience.
Step 4
Ok finally , we have come down the line so far. After installing BSD Subsystem, Press SOURCES button on the bottom pane.
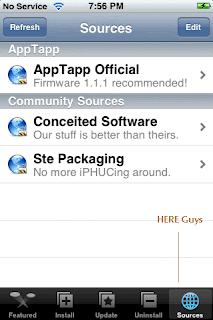
And now Press EDIT on the TOP Right.
And now Press ADD on top left
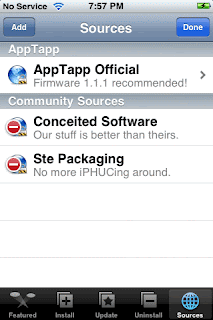 . After pressing add
enter : http://i.unlock.no
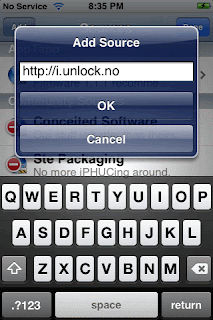
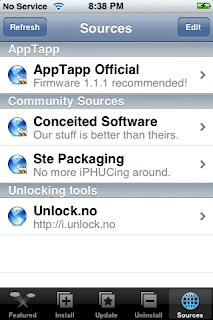
Installer will refresh its sources and then all you have to do is DONE.
Then Press REFRESH and now you'll see the folder Unlocking tools is associated with the i.unlock.no website.
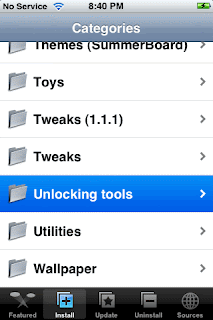
Now, press the INSTALL button on the Bottom pane and scroll down to the Unlocking tools and press it. And without looking newhere bcuz when u here , u just want to start using ur sim so just select AnySim.
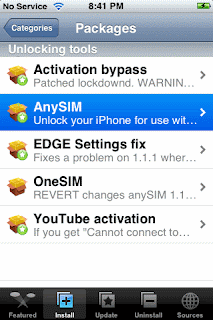
And Now, press HOME and then goto Settings > General > AutoLock > NEVER ( if u didnt do it before. )
Now Press INSTALL , on the Top Right. And before just rushing your trembling fingers on the Red base INSTALL button, JUST PRESS ONCE !!
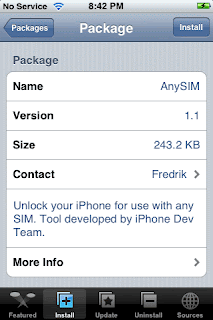
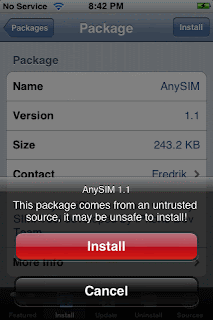
Press the Home button to relaunch the SpringBoard. You need to do this after every application you install. You should now see the anySIM application icon.
Launch AnySim and slide to unlock. AND YES AGAIN.. CLICK INSTALL ONLY ONCE.. !!
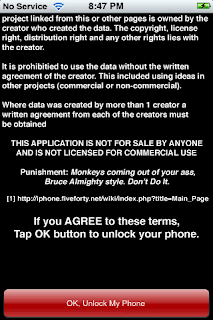
And wait for sometime. When you see this on your screen :
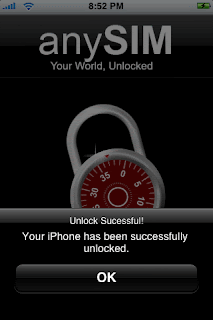
You are good to go. . !!
To remove this, goto Package and remove AnySim and Enjoy.. !!
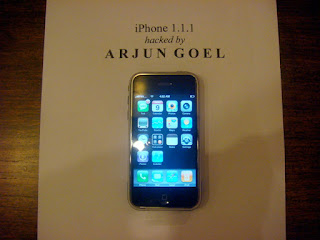
N here's the proof of my Hacked version.. : -
4 comments:
Strange to not see any comments here...
Thank you for posting this. Most of the things worked slightly different for me, but I was able to unlock my phone using no other resources except for your posting. Again, thanks a lot!
Hey Arjun,
Never Expected iPhone Unlocking to be so Simple.Worked like a charm.
Thanx a lot !!!
Thanx a lot Dude...
Its done...Courtesy U...
U R A GENIUS !!!
grate method it works like a charm
jus want to find out someting put your phone is sleep mode and try calling it and sending sms to it
a lot of ppl are getting this problem of the phone not ringing while in sleep mode ( is should ring )
i jus want to compair it with the one touch method to see if the jailbreak method’s has this effect or not
Post a Comment